Nasturtiums might be the most forgiving flower you can plant — big, easy-to-handle seeds, almost no fussing required, and a peppery, edible bloom that dresses up a salad as easily as it dresses up a garden bed. They’re also one of the few flowers that actually prefer to be neglected.
Beyond their good looks, nasturtiums earn their keep as a working part of the vegetable garden — luring aphids away from crops that matter more and adding a splash of orange, yellow, and red wherever they’re planted.
Choose the Right Nasturtium Type
Bush (dwarf) varieties — Compact, mounding plants that stay 10–15 inches tall and wide. Great for borders, containers, and small spaces. Varieties: Alaska (variegated leaves), Jewel Mix.
Trailing (climbing) varieties — Vigorous vines that can spread or climb 6–8 feet with support. Excellent for hanging baskets, spilling over raised bed edges, or scrambling up a trellis. Varieties: Empress of India (deep red blooms), Moonlight.
Best bet for most home gardeners: Bush varieties for tidy borders and containers; trailing varieties if you want them cascading over the edge of a raised bed or wall.
When to Plant Nasturtiums
Nasturtiums are frost-tender annuals — a light freeze will kill them, so timing follows warm-season crops.
- Direct sowing (recommended): Sow outdoors after your last frost date, once soil temperatures reach at least 55°F
- Starting indoors: Not usually necessary, but if you want a head start, sow indoors 2–4 weeks before your last frost in biodegradable pots (nasturtiums dislike root disturbance from transplanting)
- Succession planting: Sow a second round in early-to-mid summer for fresh blooms into fall
Not sure of your frost dates? Check the Find Your Zone guide.

Soil — Less Is More
Here’s the counterintuitive part: nasturtiums actually perform best in poor, lean soil. Rich, fertile soil produces lush green leaves at the expense of flowers — exactly backwards from what most gardeners expect.
- Choose a spot with full sun for the best blooming, though nasturtiums tolerate partial shade (with fewer flowers as a trade-off)
- Skip the compost and rich amendments at planting time
- Well-draining soil is more important than fertility — nasturtiums tolerate sandy, rocky, and average soils without complaint
- A neutral soil pH (around 6.0–7.5) works fine; nasturtiums aren’t particular
How to Sow Nasturtiums
Nasturtium seeds are large, wrinkled, and pea-sized — easy to handle and simple to sow, which makes them a favorite for beginners and a fun project for grandkids in the garden.
- Soak seeds in water overnight before planting to soften the hard seed coat and speed up germination
- Sow seeds ½ inch deep directly where you want them to grow
- Space bush varieties 10–12 inches apart; trailing varieties 12–18 inches apart to allow room to spread
- Water gently after sowing and keep soil lightly moist until germination
- Germination typically takes 7–14 days
Watering and Fertilizing
- Water regularly while seedlings are getting established, then ease back — mature nasturtiums are quite drought-tolerant
- Allow soil to dry out somewhat between waterings; consistently wet soil encourages leafy growth over blooms and can invite root rot
- Skip the fertilizer entirely. Just like with rich soil, feeding nasturtiums produces oversized leaves and few flowers. This is one plant that truly thrives on neglect.
Nasturtiums as a Companion Plant
Nasturtiums are one of the most useful companion plants in a vegetable garden, working as what’s known as a “trap crop.”
- Aphids are strongly attracted to nasturtiums — often preferring them over nearby vegetables like beans, squash, and cabbage family crops
- Planting nasturtiums near vulnerable vegetables can draw aphids away from the crops you actually want to protect
- They also help repel certain squash bugs and cucumber beetles when interplanted with squash and cucumbers
- Once aphids build up heavily on nasturtiums, simply pull and dispose of the worst-affected plants rather than treating them, protecting the rest of the garden
See the full Companion Planting Guide for more pairings like this.
Common Nasturtium Problems
Aphids — Expected, and often even useful (see companion planting above). If nasturtiums are grown purely for their own display and aphids become heavy, spray off with water or use insecticidal soap.
Cabbage worms — Occasionally feed on nasturtium leaves, leaving ragged holes. Handpick if numbers are small; damage is rarely serious enough to warrant treatment.
Lots of leaves, few flowers — Almost always caused by soil that’s too rich or too much fertilizer. Stop feeding and let the soil lean out; blooming typically picks back up.
Leggy, sparse growth — Usually a sign of too much shade. Move future plantings to a sunnier spot for fuller, more compact growth.
Harvesting Nasturtiums
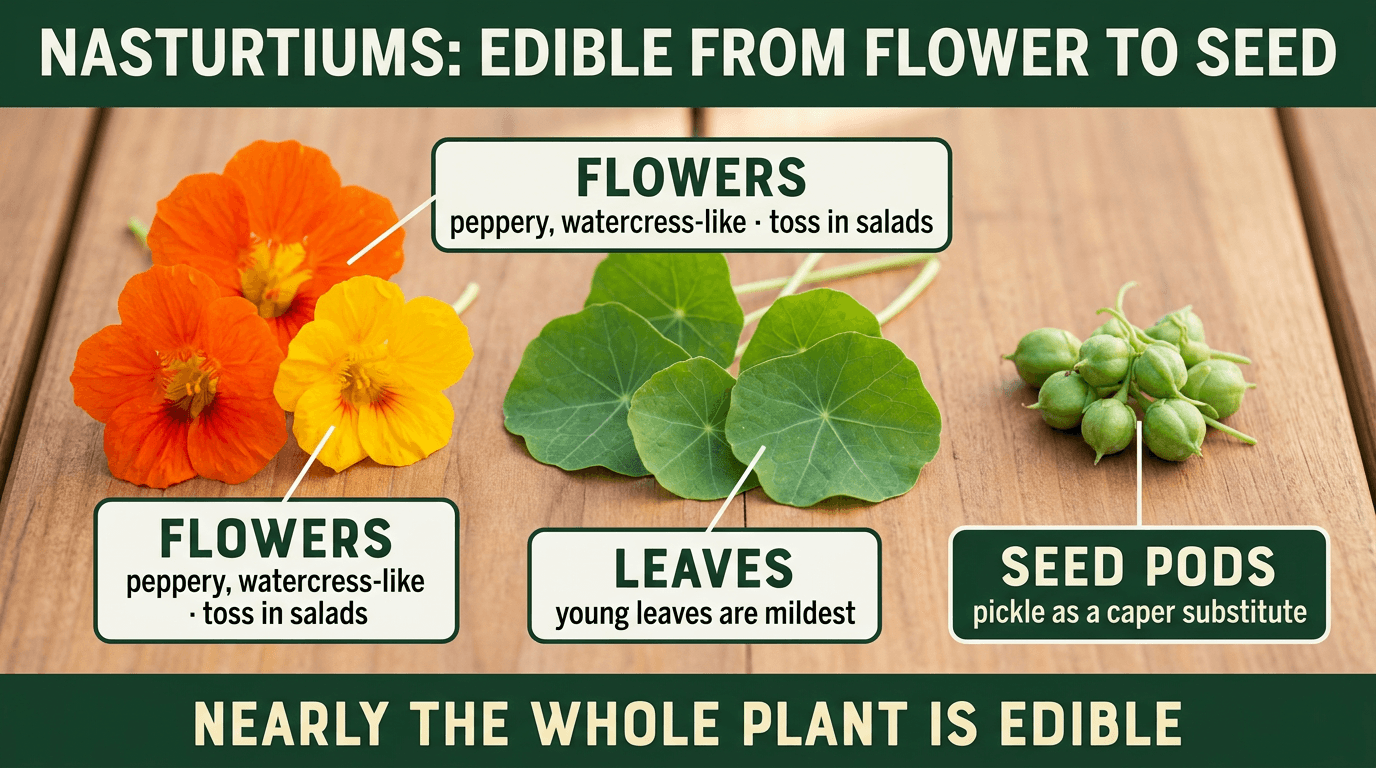
Nearly every part of the nasturtium plant is edible, with a peppery, watercress-like bite that adds a kick to salads and garnishes.
- Flowers: Pick freely once blooming begins, usually 35–50 days after sowing. Harvest in the morning for the crispest texture, and use fresh — flowers wilt quickly after picking
- Leaves: Pick young, tender leaves for the mildest flavor; older leaves grow tougher and spicier
- Seed pods: The green, unripe seed pods can be pickled in vinegar brine as a substitute for capers — sometimes called “poor man’s capers”
- Regular picking of flowers encourages the plant to keep producing more blooms throughout the season
Using and Storing Your Harvest
- Fresh is best: Nasturtium flowers and leaves don’t store well and are best used the same day they’re picked
- Short-term storage: If needed, wrap loosely in a slightly damp paper towel and refrigerate for up to 2 days
- Pickled seed pods: Cover freshly picked green seed pods with a simple vinegar brine (similar to a quick pickle) and refrigerate — they’ll keep for several weeks and develop a caper-like tang
- In the kitchen: Toss whole flowers into salads, use as a colorful garnish, or stuff blooms with soft cheese for an easy appetizer