The Best Time to Plant Garlic Depends on Where You Live
Garlic is one of those crops that rewards patience. You plant it in fall, walk away for months, and then in early summer you pull up something that looks nothing like what you put in the ground. But to get there, you need to start at the right moment — and “the right moment” varies a lot depending on your zone.
The general rule is to plant garlic 4 to 6 weeks before the ground freezes hard. You want the cloves to put down roots before winter sets in, but you don’t want them to send up tall green shoots that will get hammered by deep cold. That window is different in Minnesota than it is in Georgia, and getting the timing wrong is one of the most common garlic mistakes beginners make.
Here’s how to read the calendar by zone. In Zones 3 and 4 — places like Vermont, Minnesota, and Montana — plant between late September and mid-October. In Zones 5 and 6, which covers much of the Midwest, Mid-Atlantic, and Pacific Northwest, aim for mid-October through early November. In Zones 7 and 8, the South and parts of the West Coast, November is your month. And in Zones 9 and 10, where winters are mild, December planting is fine — or even necessary, since garlic needs some cold to develop properly.
Hardneck vs. Softneck: Which Should You Grow?
Before you buy your seed garlic, you need to decide between hardneck and softneck varieties — and this matters more than most beginners expect.
Hardneck garlic — varieties like Rocambole, Porcelain, and Purple Stripe — is what you want if you live in a cold-winter zone (3 through 6). It handles hard freezes well, produces larger cloves, and has a bolder, more complex flavor. It also sends up a curling scape in early summer, which you can harvest and eat — one of the great perks of growing your own. The downside: it doesn’t store as long, typically 4 to 6 months after curing.
Softneck garlic — Artichoke and Silverskin types — is what you see braided at farmers markets and stored in kitchen baskets. It tolerates milder winters better, stores for 9 to 12 months, and is what most grocery store garlic is. If you’re in Zone 7 or warmer, softneck varieties are your most reliable choice. In colder zones, softneck can still work, but hardneck thrives.
Skip the grocery store garlic for planting. It’s often treated to prevent sprouting, and it may not be suited to your climate. Buy certified seed garlic from a reputable nursery or online supplier — it’s worth the extra few dollars.
How to Plant: Depth, Spacing, and Bed Prep
Garlic wants well-drained soil. It will rot in soggy ground, full stop. If your soil stays wet after rain, consider building a raised bed or raised row for your garlic patch. Work in a couple of inches of compost before planting — garlic is a moderate feeder, and loose, fertile soil gives you bigger bulbs.
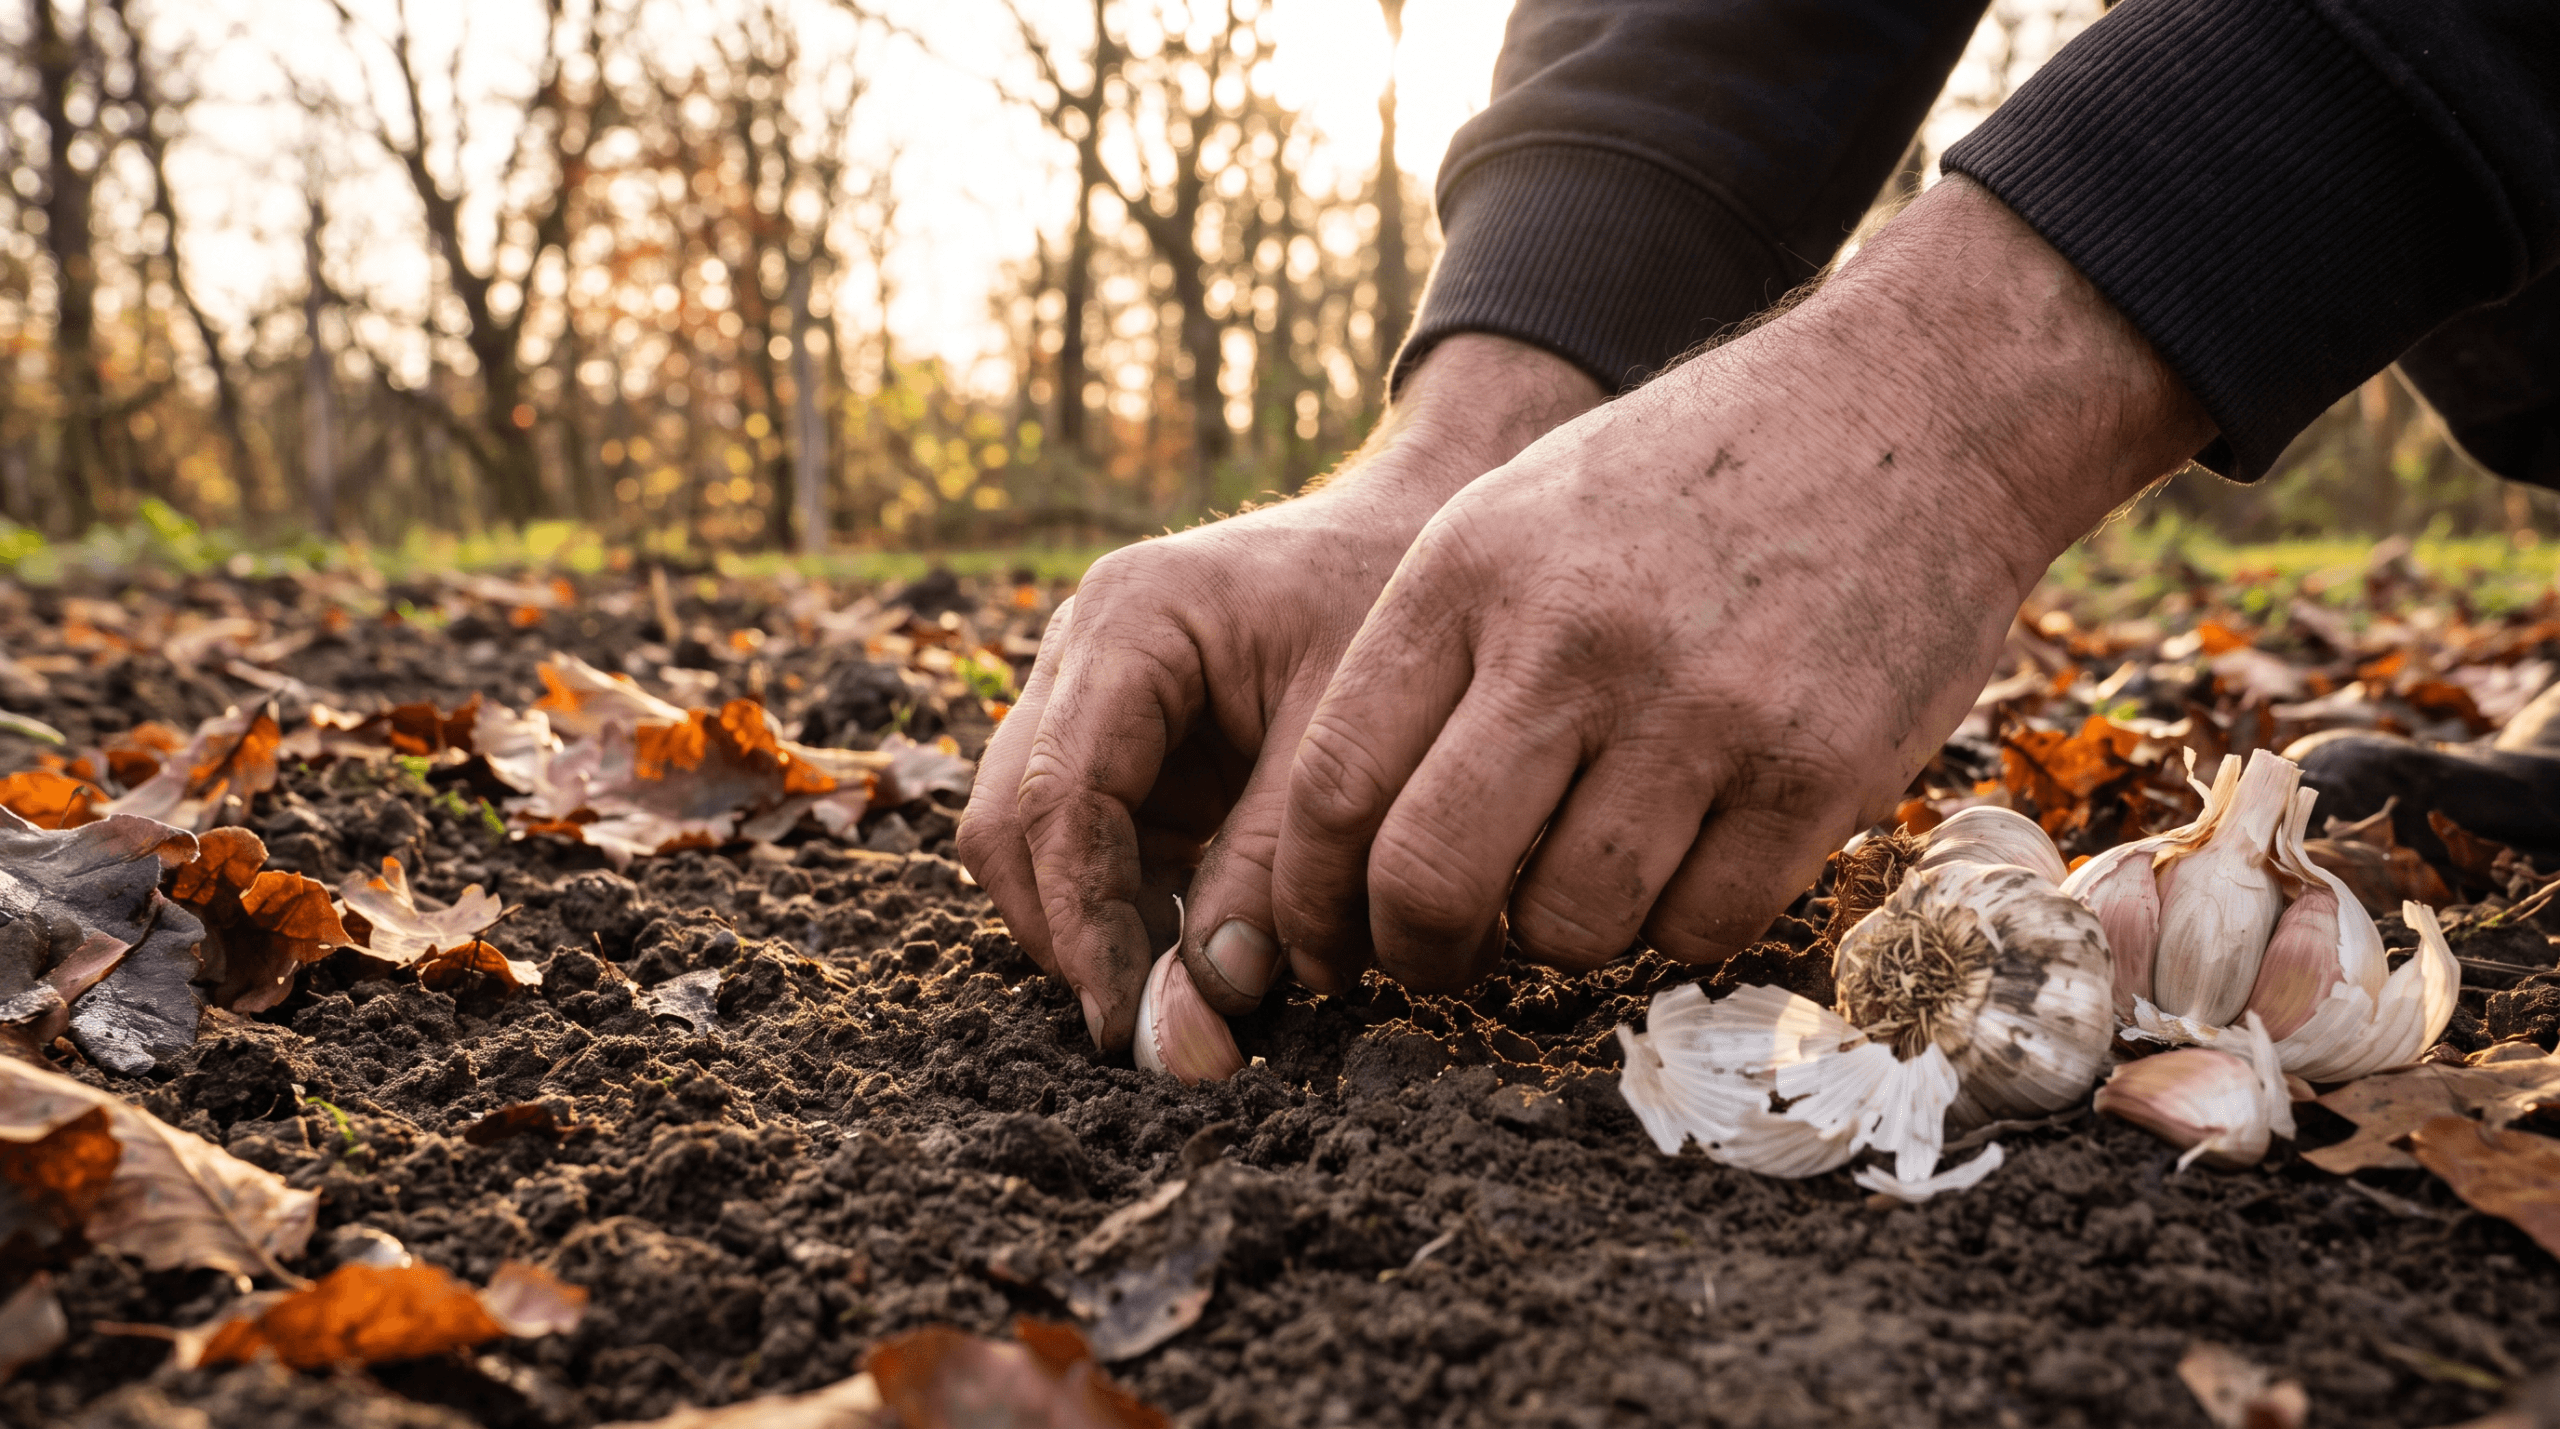
Break apart your bulbs into individual cloves just before planting, not days ahead. Plant each clove with the pointed end up and the flat (root) end down, 2 inches deep. Space them 6 inches apart in rows 12 inches apart. Planting shallower than 2 inches leaves them vulnerable to heaving out of the ground during freeze-thaw cycles. Planting deeper than 3 inches can slow emergence in spring.
The size of the clove you plant roughly predicts the size of the bulb you’ll harvest. Use the largest cloves from each bulb for planting and save the small ones for cooking. It feels counterintuitive to eat your best garlic instead of planting it, but planting the small ones consistently gives you smaller and smaller bulbs over time.
Mulching Is Non-Negotiable in Cold Zones
After planting, cover your garlic bed with 4 to 6 inches of straw mulch — or shredded leaves if you have them. This does two things: it insulates the soil through temperature swings, and it prevents the freeze-thaw heaving that can push cloves right out of the ground.
In Zones 3 and 4, mulch is essential. In Zones 7 and 8, you can get away with less — 2 to 3 inches is plenty. In Zone 9 and 10, a light mulch layer mainly helps with moisture retention rather than cold protection.
Come spring, the shoots will push up right through the straw. Leave the mulch in place — it will suppress weeds as temperatures warm and your garlic gets growing. You don’t need to pull it back or rake it away.
What to Expect in Spring
Sometime in March or April — depending on your zone — you’ll see green shoots poking up. This is one of the most satisfying moments in the vegetable garden. Don’t panic if they appear earlier than you expect, even in late winter. A light frost won’t hurt established garlic shoots. They’re tougher than they look.
Once tops emerge, water regularly if spring is dry — about 1 inch per week until about a month before harvest. Feed with a balanced fertilizer or compost tea in early spring when growth accelerates. In early summer, hardneck varieties will send up scapes — cut these off when they curl once or twice. Removing scapes directs the plant’s energy into the bulb rather than seed production.
Harvest time comes when about half the leaves have turned brown and fallen over — usually late June through July depending on your zone. Dig carefully, cure in a shaded, ventilated spot for 3 to 4 weeks, and then trim and store.
Watch Out For: Late Planting and Wrong Varieties
The two most common garlic failures are planting too late and planting the wrong type for your zone. If you plant in Zone 5 after mid-November, you’re pushing it. The cloves may not root properly before the ground freezes, and you’ll get weak, small plants in spring — or nothing at all.
Planting a Rocambole hardneck in Zone 8 isn’t catastrophic, but it’s not ideal either. The mild winter may not provide enough cold for proper vernalization, and you can end up with rounds (unbulbed garlic, essentially a single solid clove) instead of the split bulb you wanted. Match your variety to your zone — it’s the kind of small detail that makes a big difference at harvest.
Wet soil is the other silent killer. Garlic planted in poorly drained ground will sit, stall, and eventually rot. If you poke your finger in the soil before planting and it comes out muddy, wait a few days or improve drainage before you put anything in the ground.